Using a Windows PC can be easier than using the Raspberry PI. Here is a guide to set-up the Raspberry PI and connect your Windows PC to start programming in Python.
Connect up the Raspberry PI
- Get the Raspberry PI running as a PC see this list of what is required
- Plug all items in like the below image.
- Download or buy a SD card (This model uses a Miro SD card).
Install Raspbian Wheezy operating system installed. (The NOOBS SD download includes Raspbian and is what all new user should use).
First time boot up
- Power up the Raspberry Pi you should get the starting script like below
- Power install Rasbian then restart for basic setup.
- Run the following options
Enable SSH (Remote command line access )
- Double click on LX Terminal and type sudo raspi-config to get back into the configuration screen
- Select Advance Options
- Select A4 SSH Enable/Disable remote command line options
- Select Enable
Install PuTTY
- Download PuTTY on your Windows PC the putty.exe is all that is required.
- Run PuTTY
- On the Raspberry PI get the network address.
- Open LX Terminal
- type ifconfig and remember the IP address
- Configure PuTTY as below with the address
- Click Open and accept the Security alert (Accepting the rsa2 key from the device)
- Then login as pi and the password you configured earlier (default password is raspberry)
- Now you should update the Raspberry Pi to the latest version (The device needs internet access for this to work).
- In the terminal either remote or local LX terminal type sudo apt-get update (sudo means super user do) the PI will get the latest updates for the current version installed.(This should be done before upgrading the version). It will download and install in a few minutes as below

- Then get the latest version of the raspbin operating system by typing sudo apt-get upgrade this can take a very long time and will let you know how much disk space it will require as below before upgrading.

- Once upgraded reboot sudo reboot
Notepad++ editor
- Now for programming using a Windows PC I would recommend downloading and installing Notepad++.
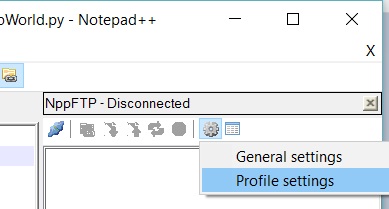
- Once installed configure as below

- Now you are ready to program
- Connect to the Raspberry Pi
- Create a folder for your python programs
- Click on File then Save and the program will be saved on the PC and then uploaded to the Raspberry PI

- Open a PuTTY session to test the code
- Type python FolderName/FileName.py see my example below

- That's it you have a great place to start programming your Raspberry PI.


No comments:
Post a Comment
Thank you fro reading my page.
Let me know if there is anything that I could add or change.
Please let me know if this information is helpful.